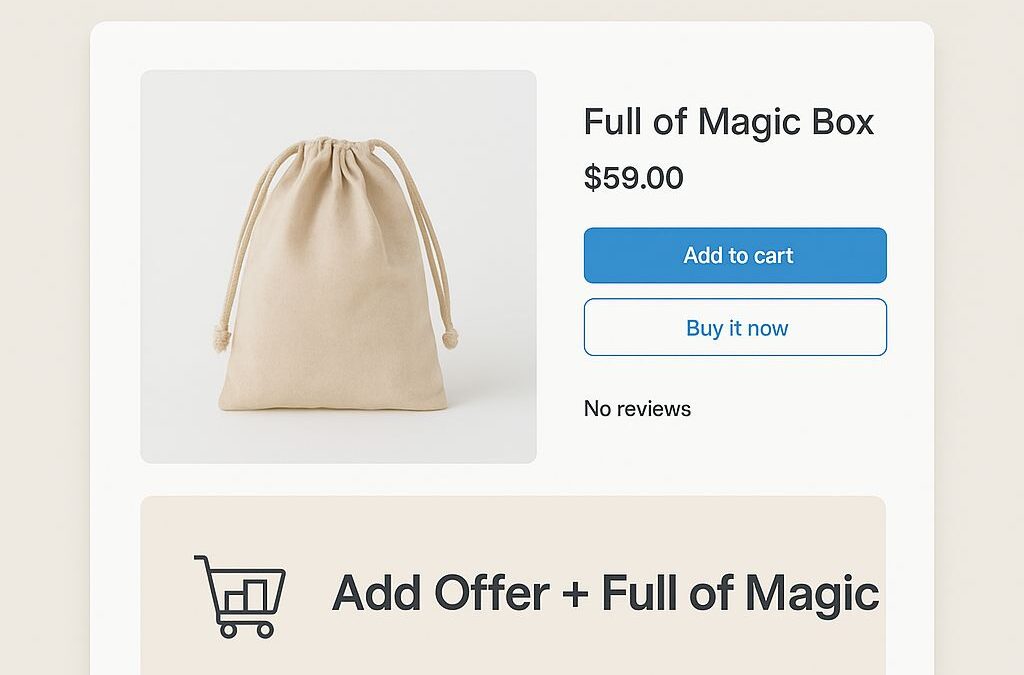
Cross-selling is one of the easiest ways to increase your average order value in your Shopify store. If you’re using the Prestige theme by Maestroo, you can add cross-sell products directly inside your product pages with a simple “magic offer banner”. In this tutorial, we’ll show you exactly how to do it.
What You’ll Achieve
-
Display a cross-sell banner below your main product description.
-
Automatically add both the main product and the cross-sell product to the cart with one click.
-
Refresh the mini-cart or cart drawer so customers see the products instantly.
Step 1: Find the Product Variant ID of Your Cross-Sell Product
-
Go to your Shopify Admin → Products.
-
Click on the product you want to offer as a cross-sell.
-
Scroll down to Variants and click the desired variant.
-
Look at the URL — the number after
variant=is your Variant ID. For example:
Here, 45985394557090 is the Variant ID.
Step 2: Edit Your Product Template
- Go to Online Store → Themes → Actions → Edit Code.
- Open the Sections → product-template.liquid file.
- Paste the following code inside the product description area (where you want the banner to appear).
{%- if product.handle == 'full-of-magic-box' -%}
<a href="#" class="magic-offer-banner">
<img src="https://via.placeholder.com/600x400?text=Add+Offer+%2B+Full+of+Magic" alt="Add Offer + Full of Magic">
</a>

<script>
document.addEventListener('DOMContentLoaded', function () {
const banner = document.querySelector('.magic-offer-banner');
if (!banner) return;

const offerVariantId = 45985394557090; // Replace with your cross-sell variant ID

banner.addEventListener('click', function (e) {
e.preventDefault();
banner.classList.add('is-loading');

// Add both products to cart
fetch('/cart/add.js', {
method: 'POST',
headers: { 'Content-Type': 'application/json' },
body: JSON.stringify({
items: [
{ id: offerVariantId, quantity: 1 },
{ id: {{ product.variants[0].id }}, quantity: 1 }
]
})
})
.then(resp => resp.json())
.then(result => {
// Refresh mini-cart / cart drawer
const event = new CustomEvent('product:added', {
bubbles: true,
detail: {
variant: { id: result.id },
quantity: 1
}
});
document.dispatchEvent(event);

banner.classList.remove('is-loading');
})
.catch(err => {
console.error(err);
banner.classList.remove('is-loading');
alert('Failed to add to cart. Please try again.');
});
});
});
</script>

<style>
.magic-offer-banner img { max-width:100%; display:block; cursor:pointer; }
.magic-offer-banner.is-loading { opacity:0.6; pointer-events:none; }
</style>
{%- endif -%}
Step 3: Customize the Banner
-
Replace the image URL (
https://via.placeholder.com/600x400) with your own banner image. -
Update the
offerVariantIdwith the variant ID of the cross-sell product you want to offer. -
Change the condition
product.handle == 'full-of-magic-box'to match the main product you want to attach the offer to.
Step 4: Save and Test
-
Save the changes in product-template.liquid.
-
Open the product page in your storefront.
-
Click on the cross-sell banner.
-
You should see both the main product and the cross-sell product added to the cart, and the mini-cart/cart drawer should refresh automatically.
Tips for Best Results
-
Use eye-catching banners to increase conversion.
-
Offer limited-time discounts for the cross-sell product to make the offer irresistible.
-
Test on mobile and desktop to ensure the banner is responsive.
Conclusion
With just a few lines of code, you can implement a seamless cross-sell experience in your Shopify store using the Prestige theme. This approach not only boosts sales but also enhances the shopping experience by encouraging customers to purchase complementary products with ease.
 Abhishek Bhandari, Full Stack Developer and Entrepreneur